Quick Start
Import package
Depending on your Unity editor version, import FlexCompiler with Package Manager or Asset Store package. If legacy version (v1.x) is already in project, please see Migration from v1 for reference.
Since v2, FlexCompiler will be imported into project "Packages" folder instead of "Assets" folder for better management.
Launch project window
Open FlexCompiler Project window at menu Window->FlexCompiler->Project Editor. An Editor window will pop up.

Add source scripts
Click New Project to do a full reset if needed.
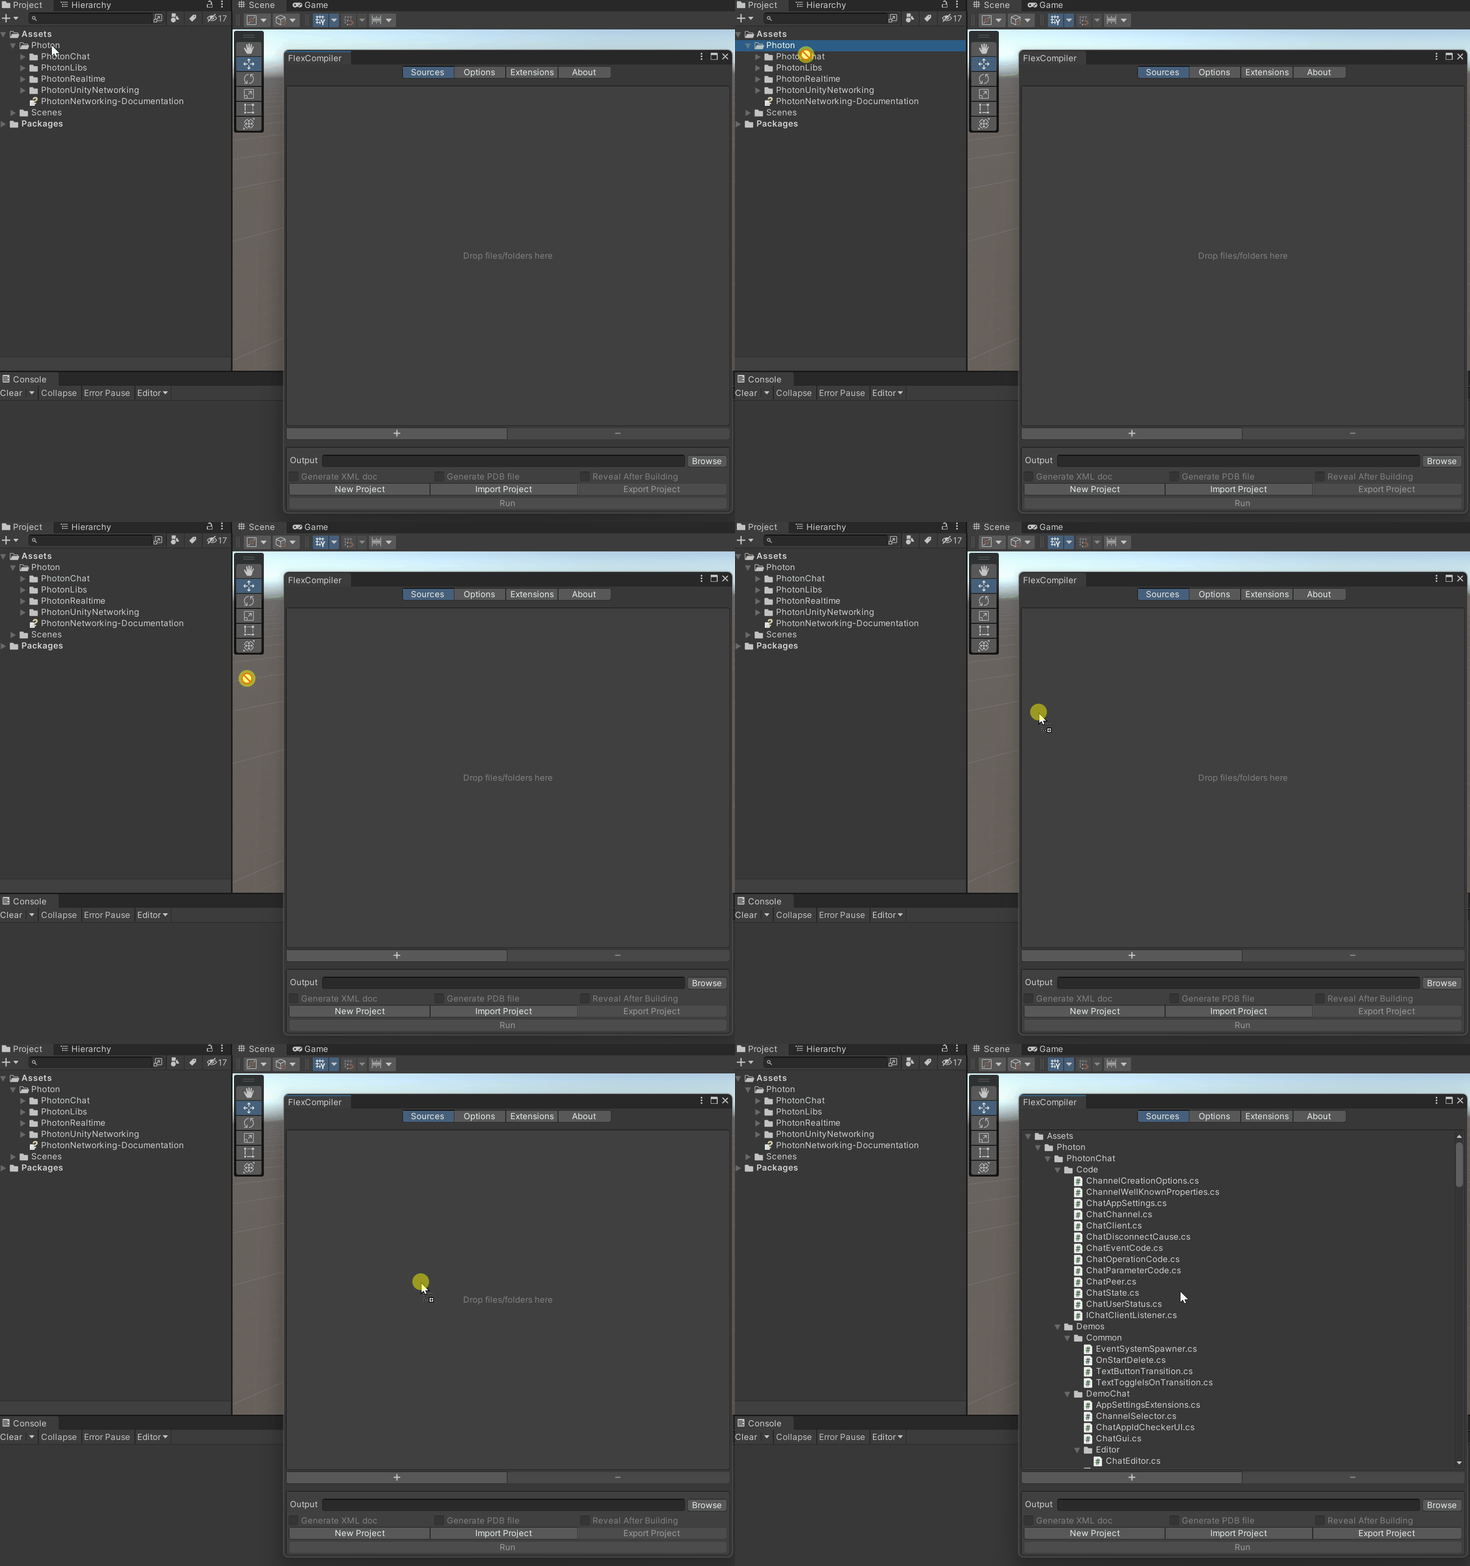
There are two methods for adding source scripts:
- Via the sources Tab: Navigate to the sources tab, then click the "+" button to browse for and add your scripts.
- Drag and Drop from Unity's project Panel: Simply drag your scripts from Unity's project panel directly onto FlexCompiler's sources panel.

When adding a folder, all scripts nested within it will be included automatically. Keep in mind that any subsequent changes made within the folder (such as adding, deleting, or renaming scripts) won't be tracked until you re-add the folder. Duplicate scripts won't be added more than once.
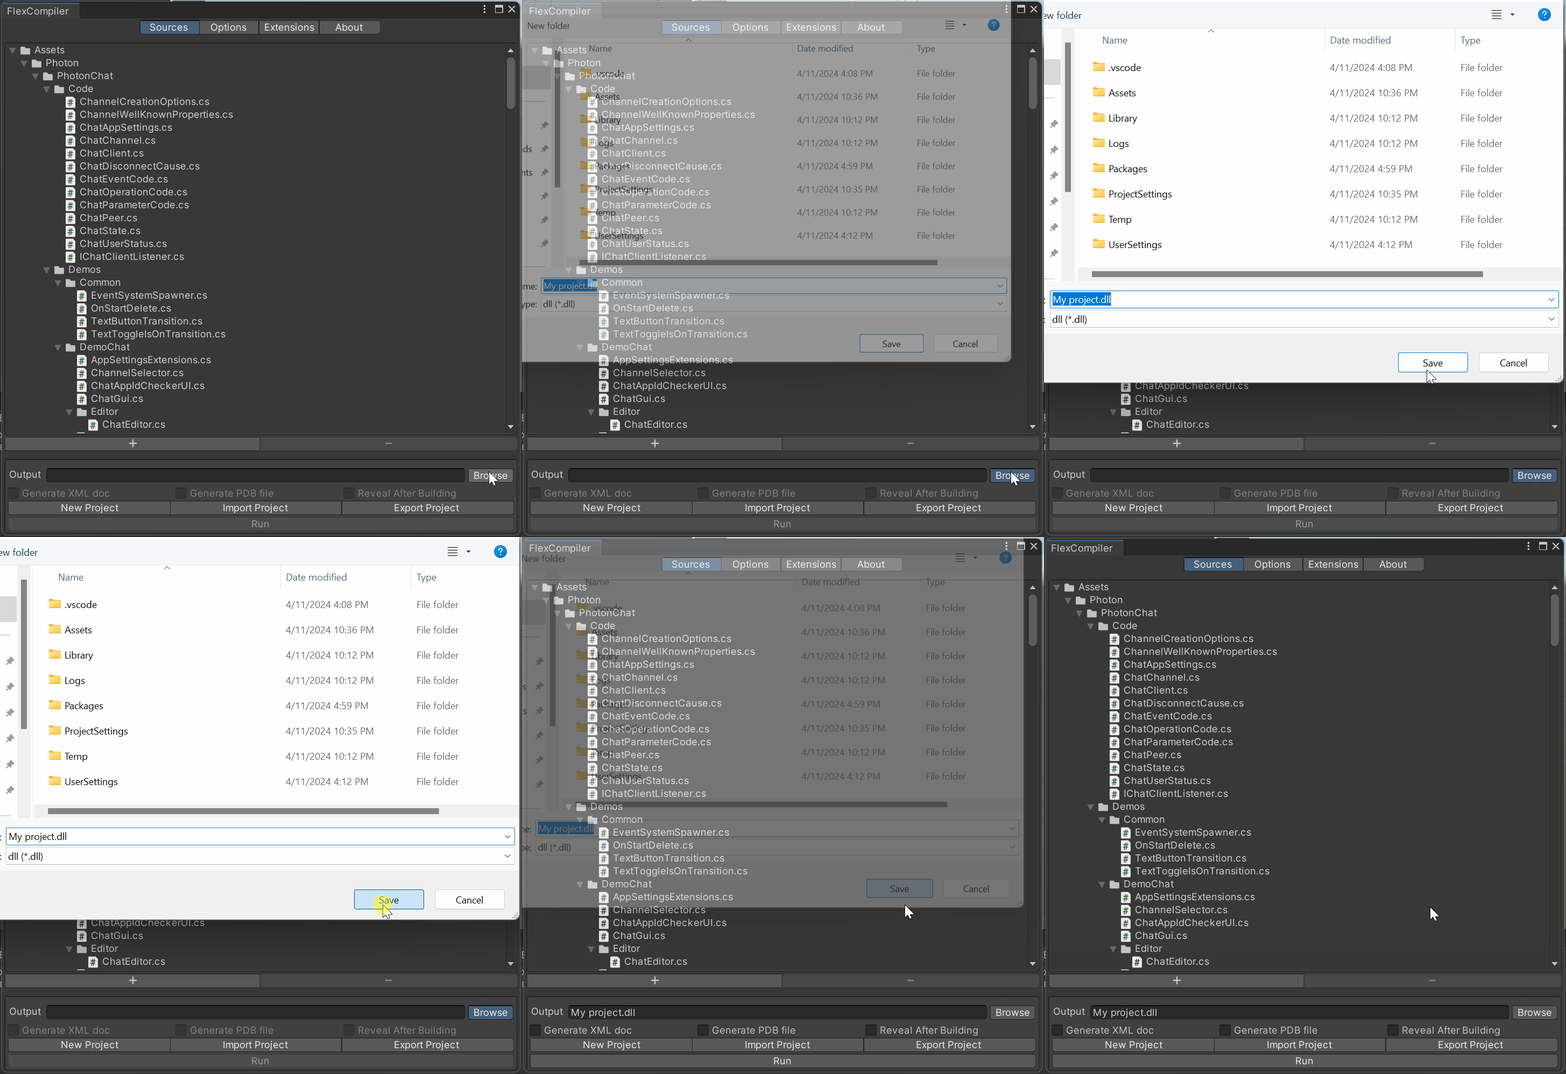
Set output path
Click "Browse" button at the bottom right of the window, choose a filepath for the output DLL. Optionally, you may check "Generate XML doc" to enable C# XML documentation generation↗ (at the same directory of the DLL file).

Run the build
Click "Run" at the bottom of the window. Check the console for result.

Export project
You may want to export the project for later use. Click "Export Project" at the bottom-right corner of the project window. The export option will only be enabled when the sources panel is not empty.